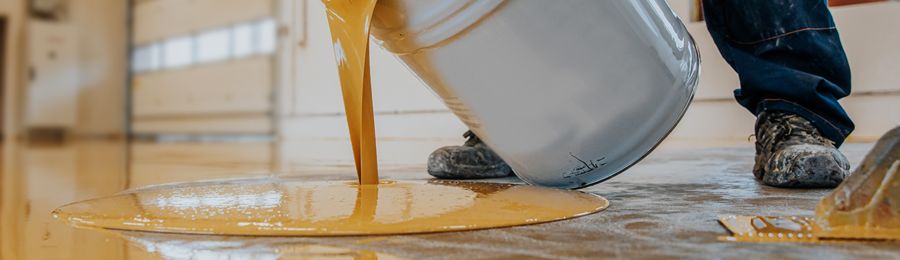

Epoxy flooring prep in Northern California determines whether a coating bonds for years or starts peeling, bubbling, or delaminating soon after installation. Most epoxy coating failures don’t start with the product itself. They start with the slab.
Before you open a kit, mix resin, broadcast flakes, or think about epoxy floor polish, the concrete needs the right profile, moisture condition, repairs, and primer.
Surface Prep Is The Foundation Of Epoxy Flooring
Epoxy flooring needs a clean, open concrete surface to bond correctly. Smooth, sealed, dusty, oily, or weak concrete can block adhesion even when you use high-quality epoxy floor coating products.
This is where many coating jobs go wrong. A floor may look clean, but the surface can still hold curing compounds, old sealers, tire residue, grease, paint, or fine concrete dust. Epoxy doesn’t fix those problems. It locks them under the coating, where they can weaken the bond.
A Clean Floor Is Not Always A Prepared Floor
Sweeping and degreasing help, but they don’t create the mechanical profile epoxy needs. Concrete must often be ground or shot blasted so the coating can bite into the surface.
A clean floor removes loose contamination. A prepared floor creates the right texture for adhesion. That difference matters on garage floors, warehouses, retail spaces, shops, restaurants, and industrial slabs.
If the concrete stays too smooth, the epoxy coating may sit on top instead of bonding into the surface.
Grinding Opens The Concrete Surface
Grinding uses diamond tooling to remove surface material and create a profile for the coating system. Contractors often use grinding to remove light coatings, smooth uneven areas, expose clean concrete, and prepare residential or commercial floors.
The right grinder, tooling, and dust control setup can change the outcome of the job. Too little grinding leaves weak material behind. Too much grinding can create uneven texture or expose repairs that need extra work before coating.
Shot Blasting Helps Heavy-Duty Floors
Shot blasting uses steel shot to clean and profile concrete. It can work well for larger commercial and industrial spaces that need strong adhesion and consistent surface texture.
This method can remove old coatings, surface laitance, and contaminants faster than grinding in the right setting. It also creates a rougher profile for certain epoxy floor coating products. The best method depends on the coating system, slab condition, floor size, and jobsite requirements.
Moisture Testing Should Happen Before Epoxy
Concrete can hold moisture even when the surface looks dry. If vapor pressure pushes through the slab after the epoxy coating goes down, the floor may blister, bubble, or lose adhesion.
Moisture testing helps you decide whether the slab is ready for epoxy flooring or needs a moisture mitigation product first. Skipping this step can turn a good installation into a costly callback.
Crack Repair Prevents Problems From Showing Through
Epoxy can create a durable surface, but it doesn’t make damaged concrete disappear. Cracks, spalls, pits, and control joint issues need repair before coating. Otherwise, those flaws may reflect through the finished floor or create weak spots in the system.
Good crack repair starts with cleaning and opening the damaged area. The repair material should match the floor’s use, the coating system, and the expected movement in the slab. A garage floor, warehouse aisle, and shop floor may not need the same repair approach.
Primer Selection Improves Bond Strength
Primer helps bridge the gap between prepared concrete and the epoxy coating. The right primer can improve adhesion, reduce outgassing, support build coats, and help the finish lay down more consistently.
Not every floor needs the same primer. A dense slab, porous slab, moisture-sensitive slab, or repaired slab may each need a different product. Choosing the wrong primer can affect bond strength, appearance, working time, and long-term durability.
DIY Epoxy Flooring Still Needs Professional Prep Thinking
DIYers often focus on the finished look first. Flakes, colors, gloss level, and epoxy floor polish all matter, but none of those details can save a floor with poor prep.
An informed DIYer should slow down before coating. Check for old sealer, oil stains, dusting concrete, cracks, moisture, and smooth trowel marks. If the surface doesn’t accept water evenly, or if the slab has visible contamination, the epoxy may not bond the way the product sheet expects.
Better Prep Starts With Better Product Choices
Every epoxy flooring project should begin with the slab, not the color chart. Look at the concrete condition, choose the right surface profile, test for moisture, repair defects, and match the primer to the coating system. Once those steps are right, your epoxy coating has a much better chance of performing the way it should.